Scan official documents with your phone
A careful phone scan is usually better than a dark photograph and safer than trying to repair a weak image later.
Practical file-preparation guidance based on real application packages. Always follow the receiving authority's current instructions.
Set up the document
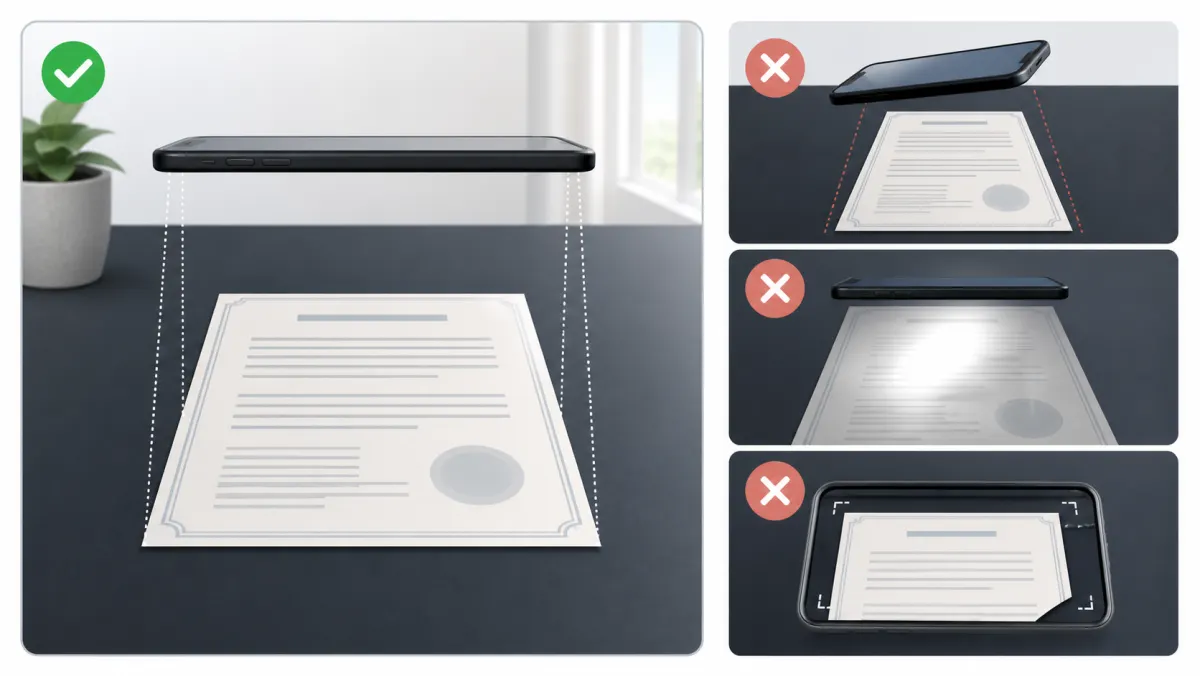
Place the paper flat on a contrasting surface in bright, even light. Avoid direct reflections on glossy paper, plastic covers and embossed seals. Keep the camera parallel to the page so text does not narrow toward one edge.
Capture every edge and page
Use your phone's document-scanning mode when available. Confirm that automatic cropping has not removed a stamp, signature, page number or reverse side. Scan both sides when either contains information, even if one side appears mostly blank.
Review at full size
- Zoom into the smallest text.
- Check names, dates and identification numbers.
- Inspect signatures, seals, QR codes and apostilles.
- Make sure no page is sideways or duplicated.
- Rescan from paper if details are already blurred.
Export once
Save as PDF for document attachments unless the portal specifically requests an image. Repeated conversion and compression cannot recover detail and may introduce visible blocks around text.
Paper, digital PDF or phone scan?
If the authority or issuer gave you a digitally signed PDF, preserve that file instead of printing and photographing it. Use a phone scan for paper originals. A screenshot is the weakest option because it can crop pages, hide signatures and discard resolution.
Build a complete file
Scan pages in reading order and include reverse sides that contain stamps, annotations or identifiers. Give each document a descriptive filename, then open the final PDF and compare its page count with the paper set. Keep the untouched scans separately before reducing the upload copy.
When to scan again
Scan again when glare crosses text, the camera was not parallel, an automatic crop removed an edge, or small characters are already blurred. Editing contrast or sharpening can make a clean scan easier to read, but it cannot restore information that the camera never captured.
Passports and bound documents
Do not force a passport or certificate flat enough to damage it. Keep the camera parallel, show the full page edge and check that the binding does not cast a shadow across names or numbers. Avoid glare from transparent covers.
Choose colour deliberately
Colour may matter when stamps or annotations distinguish information. Grayscale can reduce size, but use it only when the portal allows it and every relevant mark remains visible. Black-and-white thresholding can erase faint signatures and embossed seals.
Protect sensitive files
Government documents contain identifiers. Avoid unknown upload services and public sharing links. This site's tool processes selected files inside your browser and does not create an account or server copy.